This is a little tech guide for those who want to be 100% certain that they assembled their Tanabe exhaust system properly, although professional installation IS recommended if you are unsure! Below you will see exactly how to assemble the separate components of your exhaust system, but keep in mind the exhaust tubing itself is not pictured. VERY IMPORTANT: DO NOT use any power tools to install. Hand tools are used to ensure from over tightening or weakening a bolt. Also with a Tanabe exhaust system, all needed hardware is included and factory hangers and mounts are used.
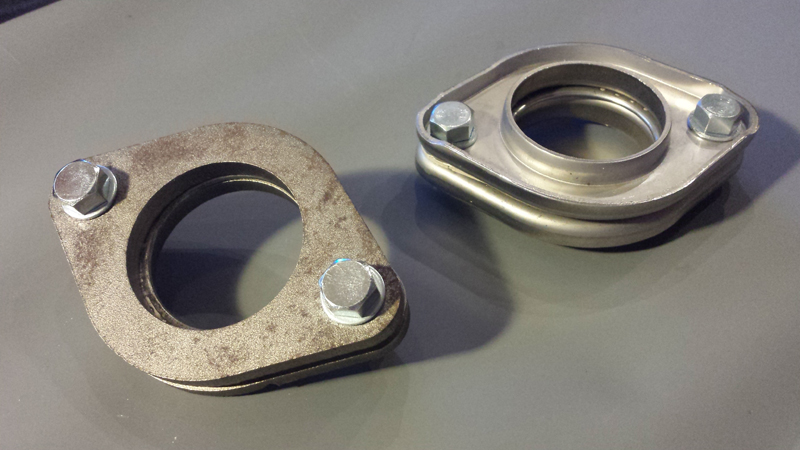
The final product should look something like this…with the exhaust installed of course.
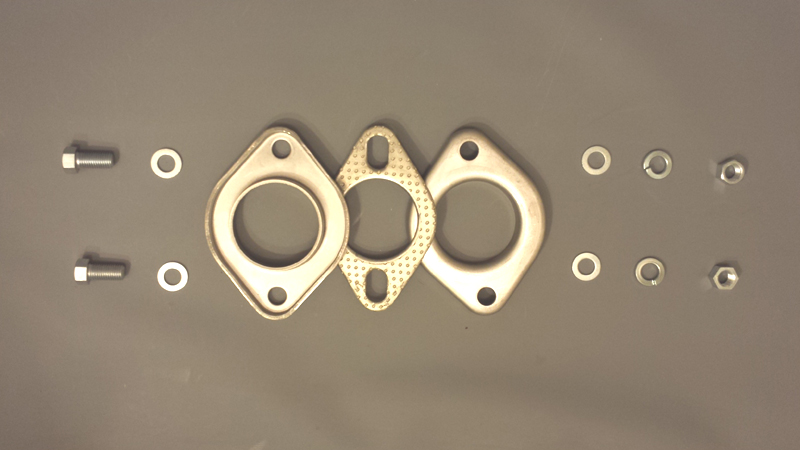
From left to right you see that your installation should be:
Bolt>Washer>Exhaust Flange>Gasket>Exhaust Flange>Washer>Lock Washer>Nut
*The lock washer helps from having the nut loosen.
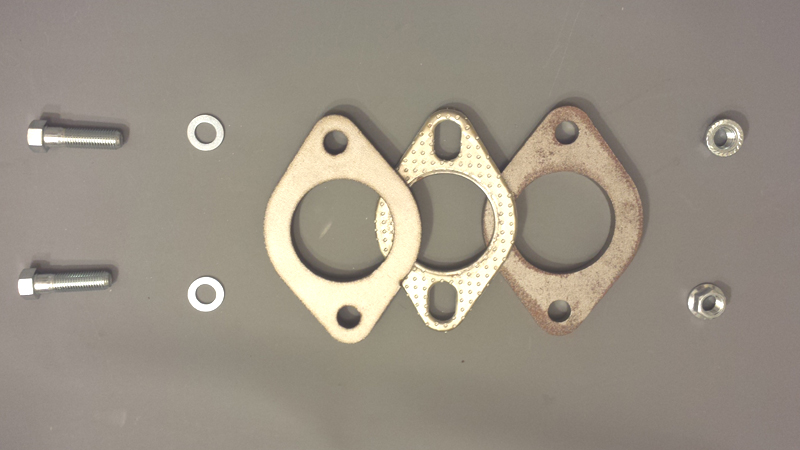
From left to right you see that your installation should be:
Bolt>Washer>Exhaust Flange>Gasket>Exhaust Flange>Lock Nut
*The lock nut helps from loosening as the grooves dig into the exhaust flange.
(One nut is flipped to show these grooves)
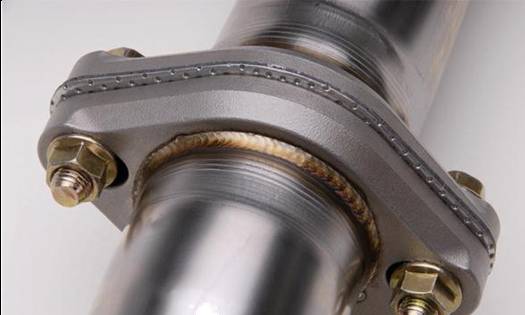
Finished product should look like this.
Again, DO NOT use any power tools. Any power tools used may cause a bolt to snap or weaken over time.

